
- What is Vacuum Bagging?
- Understanding Composites
- Key Benefits of Vacuum Bagging
- Tools and Materials You Will Need
- Basic Tools
- Materials
- Step-by-Step Guide to Vacuum Bagging Composites
- Step 1: Prepare Your Workspace
- Step 2: Lay Out Your Materials
- Step 3: Set Up the Mold
- Step 4: Layer the Materials
- Step 5: Encase in Vacuum Bag
- Step 6: Evacuate the Air
- Step 7: Curing Process
- Step 8: Demolding
- Troubleshooting Common Vacuum Bagging Issues
- Incomplete Wet-Out
- Air Leaks
- Voids in the Composite
- Surface Defects
- Advanced Techniques in Vacuum Bagging
- Infusion Techniques
- Bagging Systems with Multiple Zones
- Automated Vacuum Systems
- Conclusion
Vacuum Bagging Composites: Effortless Home Guide
Vacuum bagging composites is an innovative technique used to enhance the performance and aesthetics of various composite materials. This method is particularly valuable for those interested in DIY projects, hobbyists, or professionals looking to improve the quality of their composite creations. Whether you’re working on a small repair, crafting a model, or developing a large part for an aircraft or automotive application, understanding vacuum bagging can significantly improve your outcomes.
This article will serve as an in-depth guide for anyone wishing to utilize this technique at home, covering everything from the basic concepts to detailed step-by-step instructions, and even tips for troubleshooting common issues.
What is Vacuum Bagging?
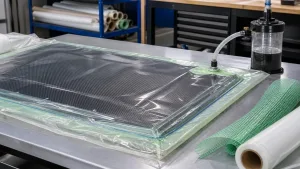
Vacuum bagging is a process where a composite material, usually containing resins and fibers, is enclosed in a bag that is then sealed and subjected to a vacuum. This means that all air is removed from the bag, creating a pressure differential that compresses the materials together. The benefits of this process include improved fiber-to-resin ratio, greater strength and durability of the final product, and enhanced surface finish.
Understanding Composites
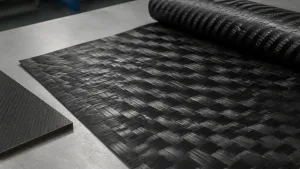
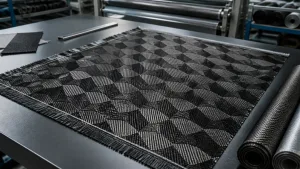
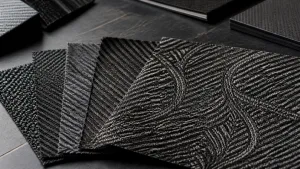
Before delving into vacuum bagging, it’s crucial to understand what composites are. Composites are materials made from two or more constituent materials with significantly different physical or chemical properties. The combined material has superior characteristics compared to its individual components. Common types of composites include:
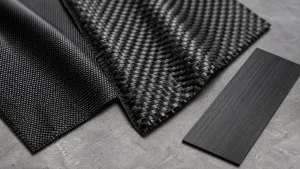
– Fiber Reinforced Polymers (FRP): Often used in aerospace and automotive industries, they include materials like carbon fiber and fiberglass.
– Metal Matrix Composites: These combine metal with other materials to enhance strength and reduce weight.
– Ceramic Matrix Composites: These are designed for high-temperature applications, often found in aerospace and manufacturing processes.
Key Benefits of Vacuum Bagging
1. Increased Strength and Stiffness: The vacuum process compresses the layers together, improving their bond and eliminating air pockets.
2. Improved Surface Finish: By applying pressure uniformly, the surface of the composite becomes smoother and less prone to defects.
3. Reduced Weight: Vacuum bagging allows for precise control of the resin-to-fiber ratio, contributing to a lighter final product.
4. Cost-Effective: While professional vacuum bagging systems can be expensive, setting up a basic bagging system at home can be relatively low-cost.
5. Versatility: This method can be used across many applications, from small model crafting to larger components in automotive or marine construction.
Tools and Materials You Will Need
To get started, you’ll need a few essential tools and materials. Here’s a comprehensive list:
Basic Tools
– Vacuum Pump: This can vary in size and power based on your project needs—ranging from small hand pumps to larger electric pumps.
– Pressure Gauge: To monitor the vacuum level.
– Sealing Machine or Heat Gun: For sealing the bag securely.
– Cutting Tools: Scissors or a knife for cutting composite materials.
Materials
– Composite Fibers: Such as glass, carbon fiber, or Kevlar.
– Resin: Epoxy or polyester resin is most commonly used. Make sure it’s compatible with your chosen fibers.
– Release Film: A plastic film that prevents the laminate from sticking to the bag.
– Breather Material: To allow airflow and prevent resin starvation.
– Vacuum Bagging Film: This is a durable plastic film specially designed to hold a vacuum.
– Tape: Duct or specialty vacuum bagging tape for sealing your setup.
Step-by-Step Guide to Vacuum Bagging Composites
With the necessary tools and materials in place, it’s time to dive into the vacuum bagging process. Each step is crucial for achieving a successful composite layup.
Step 1: Prepare Your Workspace
A clean and organized workspace is vital when working with composites. Dust, debris, or contaminants can negatively affect the final product’s integrity. Make sure you have adequate ventilation and that your workspace is free from any unnecessary items.
Step 2: Lay Out Your Materials
Before starting the actual bagging process, lay out your composite fibers and resin. Determine the arrangement and how many layers you’ll need to achieve your desired thickness.
1. Cutting the Fibers: Use sharp scissors or a cutting tool to cut the fibers to the desired size. Leave a little excess material on the edges for easy handling.
2. Pre-Wet the Fibers: It’s usually advisable to pre-wet the fiberglass or carbon fiber because it helps avoid resin pooling in the bag.
Step 3: Set Up the Mold
The mold is where the composite will be shaped and cured. Ensure it is clean and apply a release agent to prevent the composite from sticking.
– Types of Molds: You can use simple flat surfaces, or more complex shapes can be realized with specialized molds designed for your project.
Step 4: Layer the Materials
1. Breather Layer: Place the breather material over the mold. This gives your laminate a pathway for the air to escape.
2. Composite Fibers: Lay your composite fibers over the breather. Make sure to follow the desired orientation for the fibers, which will affect the strength and flexibility of the final product.
3. Resin Application: Apply the chosen resin to the fibers, ensuring even distribution across the entire surface. This process is often referred to as “wet-out.”
4. Release Film: Next, place a release film over the wet fibers. This will separate the composite from the vacuum bag material.
Step 5: Encase in Vacuum Bag
1. Lay Down the Vacuum Bagging Film: Carefully drape the vacuum bagging film over your composite setup, ensuring it covers everything completely.
2. Seal the Bag: Using vacuum bagging tape, seal the edges of the bag to create an airtight enclosure. Make sure there are no leaks, as air can ruin your vacuum and compromise the quality of the composite.
Step 6: Evacuate the Air
Connect the vacuum pump to the bag and start the evacuation process. Watch the pressure gauge to ensure you’re achieving and maintaining the desired vacuum level.
– Monitor the Vacuum: Keep an eye on the gauge during this phase and look for any signs of leaks or other issues.
Step 7: Curing Process
Once the vacuum level is stable, the resin will begin to cure. Follow the manufacturer’s instructions regarding cure times and temperatures. Depending on your chosen resin system, this could involve:
– Room temperature curing
– Heat-assisted curing for accelerated hardening
Step 8: Demolding
After the curing process is complete, carefully remove the composite from the mold:
1. Release the Vacuum: Slowly vent the vacuum to avoid any sudden changes in pressure that could damage your composite.
2. Carefully Peel Back the Bagging Material:
3. Inspect the Finished Product: Look for any voids, improperly cured areas, or defects. At this stage, you can sand or finish the composite as needed.
Troubleshooting Common Vacuum Bagging Issues
Even experienced professionals face challenges during the vacuum bagging process. Here are some common issues and their solutions:
Incomplete Wet-Out
Symptoms: Pockets of dry fabric upon inspection.
Solution: Ensure that enough resin is applied and that it is evenly distributed. Use the proper technique when wetting out the fabric, such as using a brush or roller.
Air Leaks
Symptoms: Pressure drops during the curing process.
Solution: Double-check all the seals and bag seams. If needed, re-tape or seal areas that show signs of leakage.
Voids in the Composite
Symptoms: Cavities or air bubbles in the cured composite.
Solution: Ensure that the breather material is correctly placed and that the vacuum bagging is airtight. Adding pressure to ensure all air is removed can also help.
Surface Defects
Symptoms: Uneven surfaces, wrinkles, or orange-peel effects.
Solution: Ensure the release film and bagging materials are seated properly. Avoid excessive manipulation of the materials once they are bagged.
Advanced Techniques in Vacuum Bagging
Once you have mastered the basics, you may wish to explore advanced techniques to further enhance your results.
Infusion Techniques
Vacuum infusion is a process where the resin is drawn into the dry fibrous materials under vacuum conditions. This is often more efficient as it reduces the potential for bubbles and ensures a more thorough saturation of materials.
Bagging Systems with Multiple Zones
For larger or more complex parts, using a multi-zone vacuum bagging system can allow for better control over pressure distribution. This involves designing the bagging system in segments that can be individually controlled.
Automated Vacuum Systems
As the technology matures, increasingly automated vacuum systems are becoming available. These systems can provide more consistent results, reduce manual labor, and minimize human error.
Conclusion
Vacuum bagging composites can seem challenging at first, but with the right tools, knowledge, and some practice, it becomes an accessible and rewarding technique for crafting high-quality composite materials. Whether for hobbyist projects or professional applications, understanding this process allows for improved performance, durability, and aesthetics in your creations.
By following the steps outlined in this guide and troubleshooting common issues, you’ll be well on your way to achieving impressive results. Embrace the journey of learning and enjoy experimenting with this fascinating method of composite construction.


Add comment