
- Mold Carbon Fiber Sheets: Effortless Techniques for Stunning Results
- What Are Mold Carbon Fiber Sheets?
- Understanding the Basics of Carbon Fiber Molding
- Materials Needed
- Key Techniques
- Effortless Techniques for Stunning Results
- Using the Layup Method: A Step-by-Step Guide
- Vacuum Bagging: Enhanced Quality
- Infusion Molding: A Pro-Level Technique
- Troubleshooting Common Issues
- Finishing Touches: Polishing Your Carbon Fiber Sheets
- Conclusion
Mold Carbon Fiber Sheets: Effortless Techniques for Stunning Results
Mold carbon fiber sheets have revolutionized a variety of industries, from automotive to aerospace, thanks to their lightweight and durable properties. If you’re looking to create stunning and resilient components, understanding the techniques for molding carbon fiber sheets can elevate your projects. This article will delve into effortless methods for achieving impressive results, ensuring your work stands out in quality and craftsmanship.
—
What Are Mold Carbon Fiber Sheets?
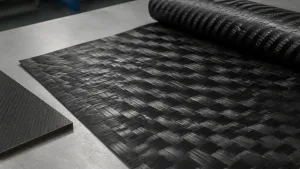
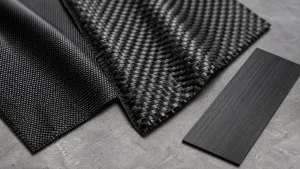
Mold carbon fiber sheets are composite materials made from carbon fibers and resin. These sheets are not only lightweight but also possess incredible strength and stiffness, making them ideal for high-performance applications. The manufacturing process involves layering carbon fiber fabrics saturated with resin, which is then cured under heat and pressure to create a solid structure.
The versatility of carbon fiber means that it can be molded into complex shapes, offering designers the freedom to explore intricate designs without sacrificing performance. This makes it a preferred material in various applications, from sports equipment to automotive parts.
—
Understanding the Basics of Carbon Fiber Molding
Before diving into the techniques, it’s crucial to grasp the fundamental aspects of carbon fiber molding. Here’s what you should know:
Materials Needed
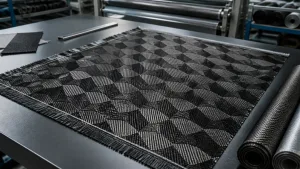
– Carbon fiber fabric: Comes in various orientations and weights. Choosing the right type based on your project’s requirements is essential.
– Resin: Epoxy is the most common resin due to its excellent adhesion properties.
– Release agent: A crucial part to ensure that the mold and the final product can be easily separated.
– Mold: This could be made from various materials including metals, plastics, or fiberglass, depending on the complexity and size of the final product.
Key Techniques
1. Layup Method: This involves layering the carbon fiber fabrics in the desired orientation on a mold. Each layer can have different orientations, which may enhance the strength of the final product.
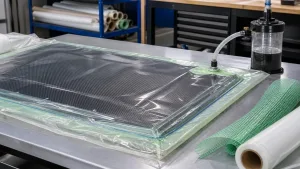
2. Vacuum Bagging: To remove air and excess resin, this technique uses a vacuum to compress the layers together, ensuring a uniform thickness and finish.
3. Infusion Molding: This process involves drawing resin into the fibers using a vacuum, which minimizes the risk of entrapped air and allows for a more controlled distribution of resin.
—
Effortless Techniques for Stunning Results
Let’s explore some techniques in detail that can help you produce beautiful, high-quality molded carbon fiber sheets:
Using the Layup Method: A Step-by-Step Guide
The layup method is one of the most straightforward techniques for molding carbon fiber sheets, perfect for beginners. Follow these steps for an effortless process:
1. Prepare Your Mold: Clean and apply a release agent to your mold to prevent the carbon fiber from sticking. This is essential for a smooth demolding process.
2. Cutting the Fabric: Measure and cut your carbon fiber sheets to size. Make sure to account for overlaps if you are layering different pieces.
3. Layering: Start laying down the first layer of fabric in the desired orientation. If you’re using multiple layers, ensure they are cross-oriented to enhance strength.
4. Mixing the Resin: Carefully mix your resin according to the manufacturer’s instructions. Be mindful of the working time and ensure it is adequately blended.
5. Applying Resin: Pour the resin over the carbon fiber, working it into the fabric with a brush or roller to ensure an even distribution.
6. Curing: Allow the mold to cure according to the resin specifications. This may take several hours or even days, depending on the type of resin used.
7. Demolding: Once cured, carefully remove the carbon fiber sheet from the mold and trim any excess material.
Vacuum Bagging: Enhanced Quality
Vacuum bagging is a technique that takes your layup to the next level by compressing the layers for a better finish. Here’s how:
1. Follow Steps 1-5 of the Layup Method: Prepare your mold, layer the fabric, and mix your resin as before.
2. Set Up the Vacuum Bag: Place the mold into a vacuum bag. Be sure that the bag is large enough to envelope the mold completely.
3. Create the Seal: Use tape to seal the bag around the edges of the mold. Ensure that there are no air leaks as this will impact the effectiveness of the vacuum.
4. Activate the Vacuum: Start your vacuum pump to remove air from the bag. The pressure will compress the layers, eliminating air pockets and excess resin.
5. Curing: Allow the components to cure while under vacuum pressure. This ensures a uniform thickness and finish.
6. Demolding: Once cured, carefully remove the vacuum bag and demold your carbon fiber component.
Infusion Molding: A Pro-Level Technique
Infusion molding can produce exceptional results but requires a bit more investment in materials and setup. Here’s how to approach it:
1. Create a Closed Mold: Both halves of the mold must be properly sealed. Invest in a high-quality mold to withstand the pressure during infusion.
2. Prepare the Fiberglass Layers: Arrange the carbon fiber layers in the mold without cutting them to ensure they reach all corners.
3. Insert Resin Injection Ports: Create ports where resin will enter the mold. These must be placed at key points to facilitate even distribution of the resin.
4. Connect a Vacuum Source: Similar to vacuum bagging, a vacuum will help eliminate air before the resin infusion begins.
5. Introduce Resin: Open the resin inlet valve under vacuum pressure. The resin will flow through the fabric, saturating it entirely.
6. Curing: Allow it to cure as per the resin specifications and then carefully demold.
—
Troubleshooting Common Issues
While molding carbon fiber sheets can yield stunning results, challenges often arise. Here are some common issues and their solutions:
– Air Bubbles: These can form during resin application. Ensure to work the resin into the fabric thoroughly and check for leaks during vacuuming.
– Uneven Finish: This can happen if the resin is not evenly applied or if the layers are not adequately compressed. Using the vacuum bagging technique can help mitigate this.
– Delamination: If layers peel apart, it usually indicates insufficient resin adhesion. Ensure proper mixing and saturation of the fabric.
—
Finishing Touches: Polishing Your Carbon Fiber Sheets
Once you’ve demolded your carbon fiber item, the finishing stages are crucial for aesthetics as well as functionality. To polish and enhance your carbon fiber sheets:
1. Sanding: Start with a coarse grit to remove any imperfections, then gradually move to finer grits for a smooth finish.
2. Sealing: Applying a clear coat can protect the surface from UV damage and scratches.
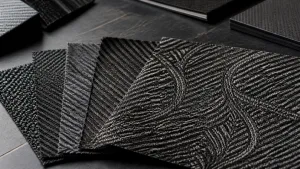
3. Buffing: Use a buffing wheel or a cloth to create a gloss finish that highlights the beauty of the carbon fiber weave.
—
Conclusion
Mold carbon fiber sheets offer endless possibilities for creating high-performance and appealing products. By understanding the basic techniques such as layup, vacuum bagging, and infusion molding, you can effortlessly turn your designs into stunning realities. Whether you are new to carbon fiber work or an experienced professional, these methods can help you achieve consistent and superior results. As you hone these skills, you’ll discover that the real beauty of carbon fiber lies not just in its aesthetic qualities, but also in its remarkable performance characteristics. So get started, explore, and let your creativity soar with mold carbon fiber sheets!

Add comment