
The Chemical Backbone: Why Your Resin Choice Dictates Your Part’s Success
In the world of carbon fiber fabrication, the fabric gets all the glory, but the epoxy resin does all the work. It is the matrix that transfers loads between fibers, protects them from the environment, and maintains the shape of your component. However, many builders—from garage hobbyists to industrial manufacturers—make the mistake of choosing “generic” epoxy. In reality, the difference between an infusion resin and a wet layup resin is as vast as the difference between water and honey. To produce professional-grade composites, you must understand three critical variables: Viscosity, Pot Life, and Glass Transition Temperature (Tg). For a comprehensive overview of how these resins integrate with different fabrics, read our Ultimate Guide to Carbon Fiber Manufacturing. If you are considering pre-saturated materials, check our guide to buying carbon fiber prepreg in bulk.
Viscosity: The Flow Factor
Viscosity is a measure of a fluid’s resistance to flow, measured in centipoise (cP). For carbon fiber work, matching the viscosity to your process is non-negotiable.
Vacuum Infusion Resins (300-600 cP)
If you are using vacuum infusion, you need a resin that flows like thin motor oil. Low-viscosity resins (typically 300 to 600 cP) are designed to travel through the compacted fiber stack under vacuum pressure. If the viscosity is too high (above 800 cP), the resin will move too slowly, potentially “gelling” before it reaches the end of the part, leaving you with a dry, ruined laminate.
Wet Layup Resins (1000-3000 cP)
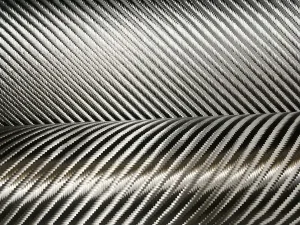
For hand layup, you actually want a higher viscosity. A thin infusion resin will simply drain out of vertical mold walls or pool at the bottom of the part. A dedicated wet layup resin (1000 to 3000 cP) has the “body” to stay where you put it, ensuring the fibers remain saturated without excessive drainage. This is especially important when using heavier fabrics like a 240g twill.

Pot Life and Cure Cycle: Managing the Heat
Pot life is the amount of time you have to work with the resin before it begins to gel. In a workshop environment, this is usually measured for a 100g or 500g mass. It’s important to remember that epoxy curing is an “exothermic” reaction—it generates its own heat. A resin with a 30-minute pot life in a small cup might gel in 15 minutes if left in a large, deep mixing bucket.
For large industrial parts, a “slow” hardener with a 90-to-120-minute pot life is standard. This gives the team time to carefully lay up complex geometries or manage a large infusion. For small components or repairs, a “fast” 20-to-30-minute system is more efficient. Always plan your layup so that you are finished at least 10 minutes before the stated pot life expires.
Tg: The Temperature Limit of Your Part
Glass Transition Temperature (Tg) is the point at which the cured epoxy begins to soften and lose its structural properties. If you are building an intake manifold for an engine or a brake duct for a race car, a standard room-temperature cure epoxy (Tg ~60-80°C) will fail. You need a high-temperature system with a Tg of 120°C to 150°C or higher.
Achieving a high Tg almost always requires a “Post-Cure.” This involves placing the cured part in an oven and slowly ramping up the temperature according to a specific schedule (e.g., 2 hours at 60°C, 2 hours at 90°C, etc.). This extra heat allows the epoxy molecules to finish cross-linking, locking the part into its final, heat-resistant state. Never skip the post-cure if your part will be exposed to heat—otherwise, it will “deform” or “creep” over time.
The Golden Rule: Mixing Ratios and Accuracy
Unlike polyester resin, where the amount of catalyst can be adjusted to speed up or slow down the cure, epoxy ratios are fixed. Whether it is a 2:1, 3:1, or 100:34 ratio by weight, it must be exact. If you add too much hardener, the resin will not “cure faster”—it will simply never reach full strength and will remain tacky or brittle. Always use a digital scale to measure by weight rather than relying on volume pumps, which can lose calibration over time.
Avoiding “Blushing” and Surface Defects
In humid environments, some epoxies can develop “amine blush”—a waxy film on the surface as they cure. If you are doing a multi-day layup, this blush must be washed off with water and a Scotch-Brite pad before adding more layers, or the new layers will delaminate. High-quality “non-blushing” resins are available and are highly recommended for professional shops to save on labor time.
Summary: The Expert’s Selection Checklist
- What is the process? Infusion = Low Viscosity; Hand Layup = High Viscosity.
- How big is the part? Large part = Long Pot Life; Small part = Short Pot Life.
- What is the environment? High Heat = High Tg + Post-Cure.
- Is aesthetics critical? Look for “UV Stabilized” and “Non-Blushing” formulations.
Add comment