
In this article:
Carbon fiber for beginners: you have seen this material on supercars and fighter jets. You want to try it yourself. This guide walks you through everything from picking the right fabric to pulling your first part out of the mold — no engineering degree required.
Carbon fiber looks intimidating. The photos show race car parts and aerospace components. The forums use terms like “autoclave” and “ply orientation.” It is easy to assume this material is out of reach for a home workshop. It is not. This carbon fiber for beginners guide is designed to prove that.
Tens of thousands of DIYers — car enthusiasts, drone builders, 3D printing hobbyists, and weekend makers — work with carbon fiber every day in their garages and basements. The tools are affordable. The learning curve is short. The results are genuinely impressive.
Carbon fiber is a composite material made from ultra-thin carbon filaments — each thinner than a human hair — woven into fabric and bonded with epoxy resin to create parts that are 5x stronger than steel at a fraction of the weight. This is the definition you will find in any textbook, but what matters for you as a beginner is simpler: it is a fabric you can shape into almost anything, then harden into a part that looks and performs like a professional product.
The goal of this guide is to get you from zero to your first completed carbon fiber part in one weekend. No filler. No unnecessary theory. Just what you actually need to know.
What Is Carbon Fiber, Really?
Carbon fiber starts as a precursor material — typically polyacrylonitrile (PAN), the same family of polymers used in acrylic clothing. The PAN fibers are heated to over 1,000C in an oxygen-free environment, a process called carbonization. The non-carbon atoms burn off. What remains is a filament that is over 90% pure carbon, arranged in tightly bonded hexagonal crystals similar to graphite.
A single carbon fiber filament is about 5-10 microns wide. For reference, a human hair is about 70 microns. These individual filaments are bundled into “tows” — groups of 1,000 (1K), 3,000 (3K), 6,000 (6K), or 12,000 (12K) filaments. The tows are then woven into fabric on industrial looms, much like cotton or polyester.
When you buy a sheet of carbon fiber fabric, you are holding thousands of individual tows woven together. The weave pattern, tow size, and fabric weight all affect how the material handles and what the finished part looks like. Understanding these three variables is 80% of choosing the right material.
Why DIYers Are Switching to Carbon Fiber
Carbon fiber used to be reserved for Formula 1 teams and defense contractors. Three things changed that: prices dropped, epoxy resins became shelf-stable and easy to mix, and YouTube creators started publishing tutorials. A beginner carbon fiber kit now costs less than a decent 3D printer.
The appeal is straightforward. Carbon fiber parts are dramatically lighter than aluminum or steel — a flat panel that weighs 200 grams in aluminum weighs around 120 grams in carbon fiber, with comparable stiffness. The material does not rust, does not fatigue in the same way metals do, and has a distinctive weave pattern that looks premium without paint or finish work.
Common DIY applications include automotive interior trim (dash panels, shift knobs, door cards), drone frames and arms, bicycle component skinning, custom phone cases, laptop skins, and small structural repairs. Once you learn the basic wet layup process, the only limit is your mold-making ability.
Understanding Carbon Fiber Fabric Types
Carbon fiber fabric is not one product — it is a category with dozens of variations. For your first project, you need to understand three things: tow size, weave pattern, and fabric weight.
Tow Size: 3K vs 6K vs 12K
Tow size tells you how many individual filaments are in each bundle. 1K (1,000 filaments) is rare and expensive, used mainly in aerospace. 3K (3,000 filaments) is the standard for most consumer projects — it produces a fine, detailed weave pattern and handles well on curves. 6K (6,000 filaments) splits the difference. 12K (12,000 filaments) creates a bold, high-contrast pattern that looks dramatic but is harder to work with because the thicker tows resist draping over tight curves.
For your first project, buy 3K. It is the most forgiving and the most versatile. You can move to 12K later once you understand how the material behaves.
Weave Pattern: Plain, Twill, and Satin
Plain weave is a simple over-under pattern, like a checkerboard. It is stable, does not distort easily, and works well for flat panels. The downside: it does not drape well over compound curves.
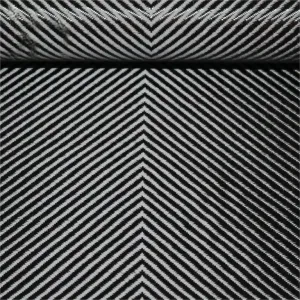
Twill weave uses a 2×2 or 4×4 diagonal pattern that looks like the weave on a pair of jeans. It drapes better than plain weave, conforms to moderate curves, and has the classic carbon fiber look most people want. This is the recommended weave for beginners.
Satin weave (also called harness satin) skips multiple tows between interlacing points. It drapes beautifully over complex shapes — think motorcycle fairings or contoured interior panels — but the loose structure makes it harder to handle without distorting the weave. Save this for your third or fourth project.
Here is a quick reference for choosing your first carbon fiber fabric:
| Fabric Type | Best For | Drape Quality | Beginner Friendly |
|---|---|---|---|
| 3K Twill 200-280gsm | General DIY, automotive trim, flat panels, moderate curves | Good | Recommended |
| 3K Plain 200gsm | Flat panels, simple shapes, structural parts | Limited | Good |
| 12K Spread Tow 80-88gsm | Large flat panels, decorative skins, bold look | Poor | Not recommended |
| 2×2 Twill 3K 240gsm | Compound curves, motorcycle parts, helmet shells | Very good | Good (with practice) |
| Satin/Harness 3K 200gsm | Complex curves, professional finishing | Excellent | Advanced only |
Fabric Weight: Understanding gsm
Carbon fiber fabric weight is measured in grams per square meter (gsm). A 200gsm fabric means one square meter of dry fabric weighs 200 grams. For beginners, 200-280gsm is the sweet spot. Lighter fabric (under 150gsm) is too delicate and easy to damage during handling. Heavier fabric (over 400gsm) requires more resin and is harder to wet out fully.
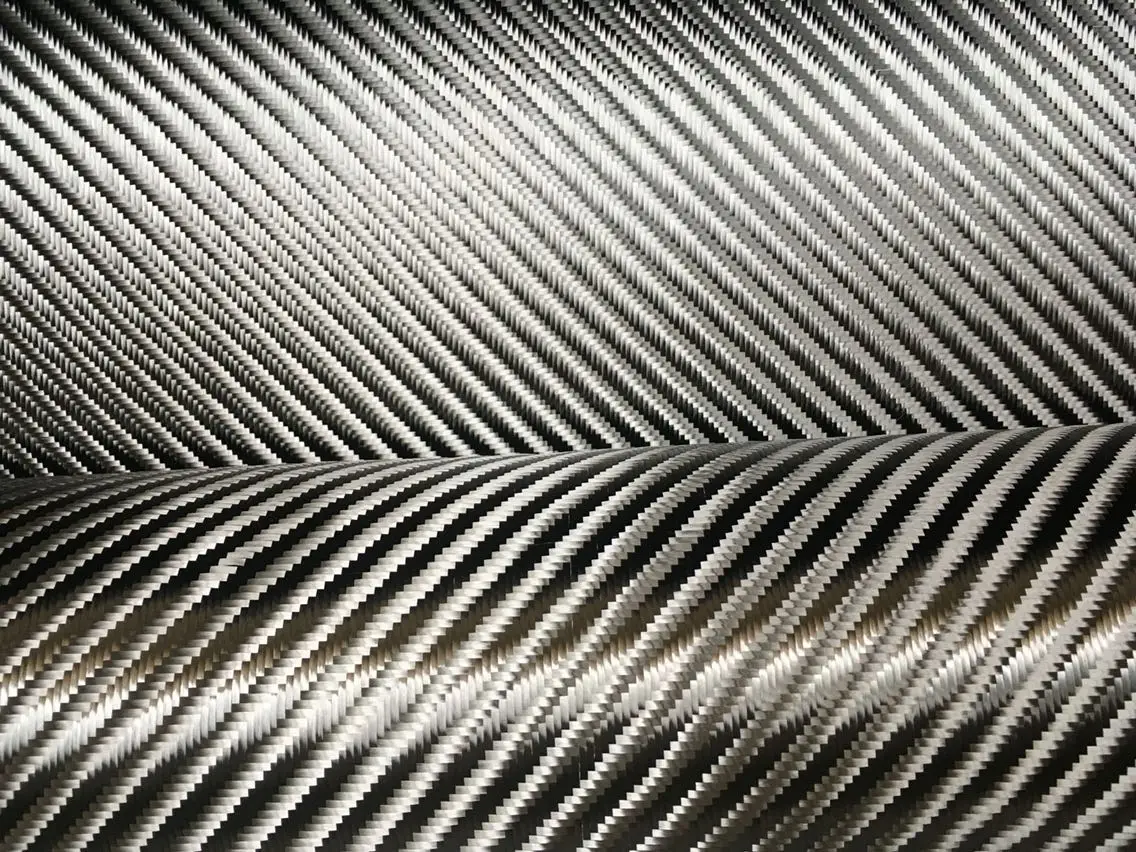
Large Twill 3K 280gsm 4×4 Carbon Fiber Cloth
The perfect starter fabric — 3K twill weave drapes easily over curves, 280gsm weight is substantial enough to handle without tearing, and the 4×4 pattern gives an unmistakable carbon fiber finish.
3K Tow
280 gsm
4×4 Twill
Shop Now →
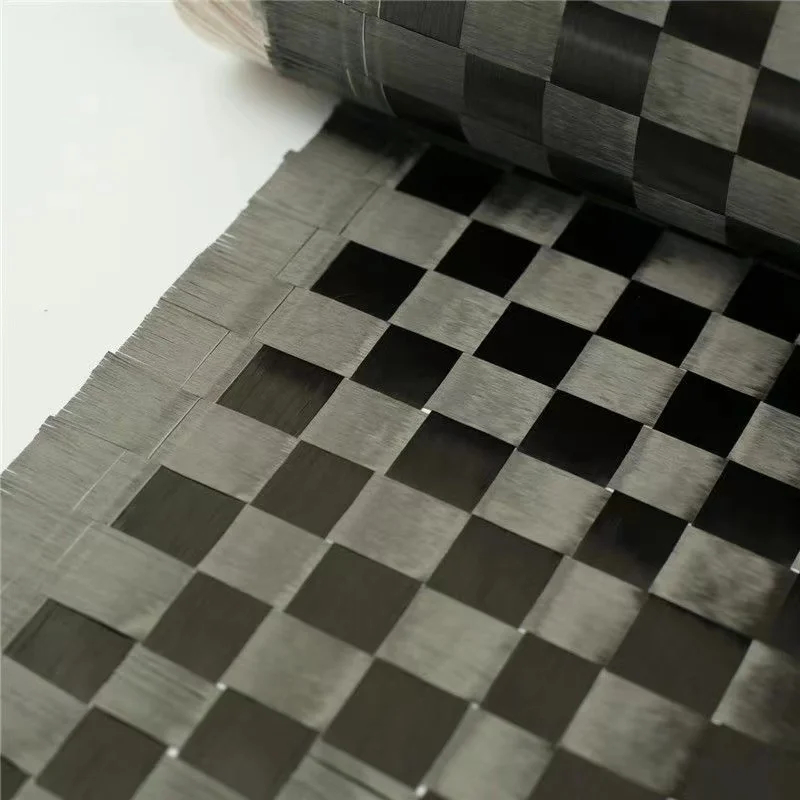
12K Spread Tow Carbon Fiber Fabric 88g Thin 0.1mm
Once you have a few projects under your belt, try 12K spread tow for large flat panels and skins. The dramatic wide-tow pattern produces a show-stopping look that 3K cannot match.
12K Tow
88 gsm
0.1mm Thin
Shop Now →
Essential Tools and Supplies for Your First Project
A basic non-structural wet layup does not normally require a clean room or an industrial vacuum system. It still requires an appropriate workspace, ventilation, PPE, accurate mixing tools, compatible release materials and safe cutting and finishing practices.
The Minimum Viable Toolkit
| Item | Why You Need It | Approx. Cost |
|---|---|---|
| Epoxy resin + hardener | The “glue” that bonds the fibers into a solid part. Use a laminating epoxy — not 5-minute hardware store epoxy. | $25-40 |
| Mixing cups (graduated) | Accurate resin-to-hardener ratio is critical. Eyeballing leads to sticky, uncured parts. | $5 |
| Disposable brushes (chip brushes) | For applying resin to fabric. Do not reuse — cured epoxy ruins brushes instantly. | $5/pack |
| Nitrile gloves | Epoxy resin is a skin irritant. Wear gloves. Every time. | $8/box |
| Release agent (wax or PVA) | Prevents the cured part from bonding permanently to your mold. Skip this step and you will destroy both. | $10-15 |
| Scissors (dedicated fabric shears) | Carbon fiber dulls scissors quickly. Buy a dedicated pair and label them. | $10 |
| Laminating roller (aluminum) | Pushes air bubbles out and consolidates layers. A must-have, not optional. | $8-15 |
| Acetone (hardware store) | Cleans tools and uncured resin spills. Do not use on skin. | $8/liter |
| Respirator mask (organic vapor) | Epoxy fumes are harmful. A dust mask is not enough. Get an OV-rated respirator. | $25-40 |
Total startup cost: roughly $100-150 for tools and consumables, plus your carbon fiber fabric. That is less than most hobbies and the tools will last through dozens of projects.
Workspace Setup
You need three things from your workspace: ventilation (open garage door + box fan), a flat work surface you can get resin on (cover with plastic sheeting), and temperature control (epoxy cures best at 20-25C / 68-77F). If your garage is below 15C (60F), the resin may not cure properly. If it is above 30C (86F), it will cure too fast and trap air bubbles.
Step-by-Step: Your First Carbon Fiber Layup
This is a basic wet layup — the simplest carbon fiber process. You are going to make a flat panel, which is the ideal first project. Flat panels teach you resin mixing, wet-out technique, bubble removal, and curing without the added complexity of mold-making.
What You Need for This Project
- 1-2 layers of 3K twill carbon fiber fabric, cut to size (e.g., 20cm x 30cm)
- Laminating epoxy resin + hardener (mixed per manufacturer ratio)
- A flat mold surface — a sheet of glass or polished aluminum works perfectly
- Mold release wax (apply 3 coats, buff between each)
- Mixing cup, brush, roller, gloves, respirator
The Process (8 Steps)
Step 1 — Prep the mold. Apply mold release wax to your glass or aluminum sheet. Three coats minimum, buffing with a clean cloth between each. A properly waxed mold surface should feel slick, not grippy. Any spot you miss will bond permanently to the carbon fiber.
Step 2 — Cut your fabric. Use sharp fabric shears to cut the carbon fiber slightly larger than your finished part size. Carbon fiber frays at cut edges — a 5mm margin on all sides gives you room to trim later. Handle the cut fabric gently to avoid distorting the weave.
Step 3 — Mix the resin. Read the manufacturer’s instructions. Most laminating epoxies mix at 2:1 or 3:1 resin-to-hardener by weight or volume. Measure accurately in a graduated cup. Stir slowly for 2 minutes, scraping the sides and bottom. Fast stirring introduces air bubbles. Let the mixed resin sit for 2-3 minutes to let bubbles rise out.
Step 4 — Apply the first resin coat. Brush a thin layer of mixed epoxy onto the waxed mold surface. This “gel coat” layer will be the visible face of your finished part, so brush evenly and pop any visible bubbles with the tip of the brush.
Step 5 — Lay the fabric. Place your cut carbon fiber fabric onto the wet resin. Start from one edge and lay it down gradually — dropping the whole piece at once traps air underneath. The fabric should darken as it absorbs resin from below.
Step 6 — Wet out the fabric. Pour a small amount of resin onto the center of the fabric and spread it outward with your brush. Use dabbing motions rather than brushing strokes — brushing pulls the weave and distorts the pattern. The goal is to saturate every fiber without flooding the surface.
Step 7 — Remove air bubbles. Roll the surface with your aluminum laminating roller. Work from the center outward. You will see air bubbles move ahead of the roller and eventually disappear. Pay extra attention to edges and corners where bubbles like to hide. A properly rolled panel should look glossy and uniform, with no white or hazy patches (per ASTM D2563, a correctly wet-out laminate should have less than 2% void content visible).
Step 8 — Cure. Leave the part undisturbed for the full cure time specified by your epoxy — typically 12-24 hours at room temperature. Do not touch it, do not move it, do not check on it every 10 minutes. Lifting the part mid-cure is the fastest way to ruin it. After full cure, trim the edges with a Dremel or fine-tooth hacksaw and sand to your final dimensions.
7 Beginner Mistakes (and How to Avoid Them)
Every experienced carbon fiber fabricator has made every one of these mistakes. Here they are so you can skip straight to getting it right.
1. Skipping the respirator. Epoxy fumes are not just unpleasant — they are respiratory sensitizers. Each exposure makes you more sensitive to future exposures. A proper OV-rated respirator costs $30 and lasts months. Use it.
2. Using the wrong epoxy. Five-minute hardware store epoxy sets before you finish wetting out the fabric. Laminating epoxy gives you 30-60 minutes of working time. The two are not interchangeable. Check the pot life on the label before buying.
3. Poor mold release prep. One missed spot of wax = one destroyed mold and one ruined part. Apply three coats. Buff thoroughly. Test with a drop of water — it should bead up and roll off. If it spreads, wax again.
4. Mixing resin by eye. Epoxy chemistry is unforgiving. A 5% error in your mixing ratio can mean a part that never fully cures. Use graduated cups. Measure both components. Do not guess.
5. Over-saturating the fabric. More resin does not equal stronger parts — it equals heavier, more brittle parts with excess resin pooling on the surface. The ideal fiber-to-resin ratio for a wet layup is about 50:50 by weight. If the surface looks like a puddle, you used too much resin.
6. Starting with 12K fabric. 12K spread tow looks incredible in photos and is genuinely tempting for a first project. It will also fray at the cut edges, resist draping, and expose every handling mistake in high-contrast detail. Learn on 3K. Upgrade to 12K for your fourth or fifth project.
7. Rushing the cure. Applying heat to speed up curing sounds logical but causes the outer resin layer to set before the inner layers, trapping solvents and creating micro-voids. Let the part cure at room temperature for the full specified time. Patience is a composite skill too.
Before You Start Your First Layup: A Checklist
FAQ
Do I need a vacuum pump for my first carbon fiber project?
No. A basic wet layup (hand layup) without vacuum bagging produces perfectly usable parts. Vacuum bagging improves fiber-to-resin ratio and surface finish, but it adds cost, complexity, and failure modes. Learn wet layup first — when you are getting consistent results, then graduate to vacuum bagging techniques.
How much does it cost to start working with carbon fiber?
Starter costs vary substantially by country, fabric specification, resin system, project size, PPE already owned and shipping. Build the budget from current quotations for the exact bill of materials instead of relying on a fixed generic total.
Can I use carbon fiber over an existing part (skinning)?
Yes. Carbon fiber skinning — wrapping carbon fiber fabric over an existing plastic or metal part — is a popular technique for automotive interior trim, phone cases, and laptop lids. The process is similar to a standard layup: prep the surface with sandpaper for adhesion, apply resin, lay fabric, wet out, and clear coat. The original part stays underneath as the structural core.
Why does my cured carbon fiber part feel sticky?
A tacky or sticky surface after full cure time almost always means one of two things: incorrect resin-to-hardener mixing ratio, or the part was cured at too low a temperature. Epoxy needs at least 18-20C (65-68F) to fully cross-link. If your workspace is cold, move the part to a warmer room or use a space heater (placed at a safe distance). Sticky parts rarely fix themselves — you may need to sand off the uncured layer and apply a fresh coat of properly mixed resin.
Is carbon fiber stronger than fiberglass?
By weight, yes — carbon fiber has a tensile strength of 3.5-7.0 GPa compared to fiberglass at 2.0-3.5 GPa, and is about 30% lighter. But carbon fiber is also 3-5x more expensive and more brittle under impact. For projects where cost matters more than weight (boat repairs, general reinforcement), fiberglass is often the better choice. See our full carbon fiber vs fiberglass comparison for a detailed breakdown.
Key Takeaways
- Start with 3K twill carbon fiber at 200-280gsm — it is the most forgiving fabric for beginners and produces excellent results on your first try.
- A starter wet-layup budget should include fabric, a compatible resin system, release materials, mixing and application tools, consolidation tools, PPE, trimming supplies and waste allowance.
- Mold release prep is the single most important prep step — three coats of wax, thoroughly buffed, or your part will be permanently bonded to the mold.
- Do not skip the respirator and nitrile gloves. Epoxy sensitization is cumulative and irreversible.
- Your first project should be a simple flat panel. Master the fundamentals — resin mixing, wet-out, bubble removal — before attempting curved molds or vacuum bagging.
Get your 3K carbon fiber fabric → — The fabric we recommend for every first-time builder. Ships from stock with worldwide delivery.
Add comment